
Onsite Sales
Setting up on-site sales
Set up a purchase page to sell items and merchandise at your event.
Branding your purchase page
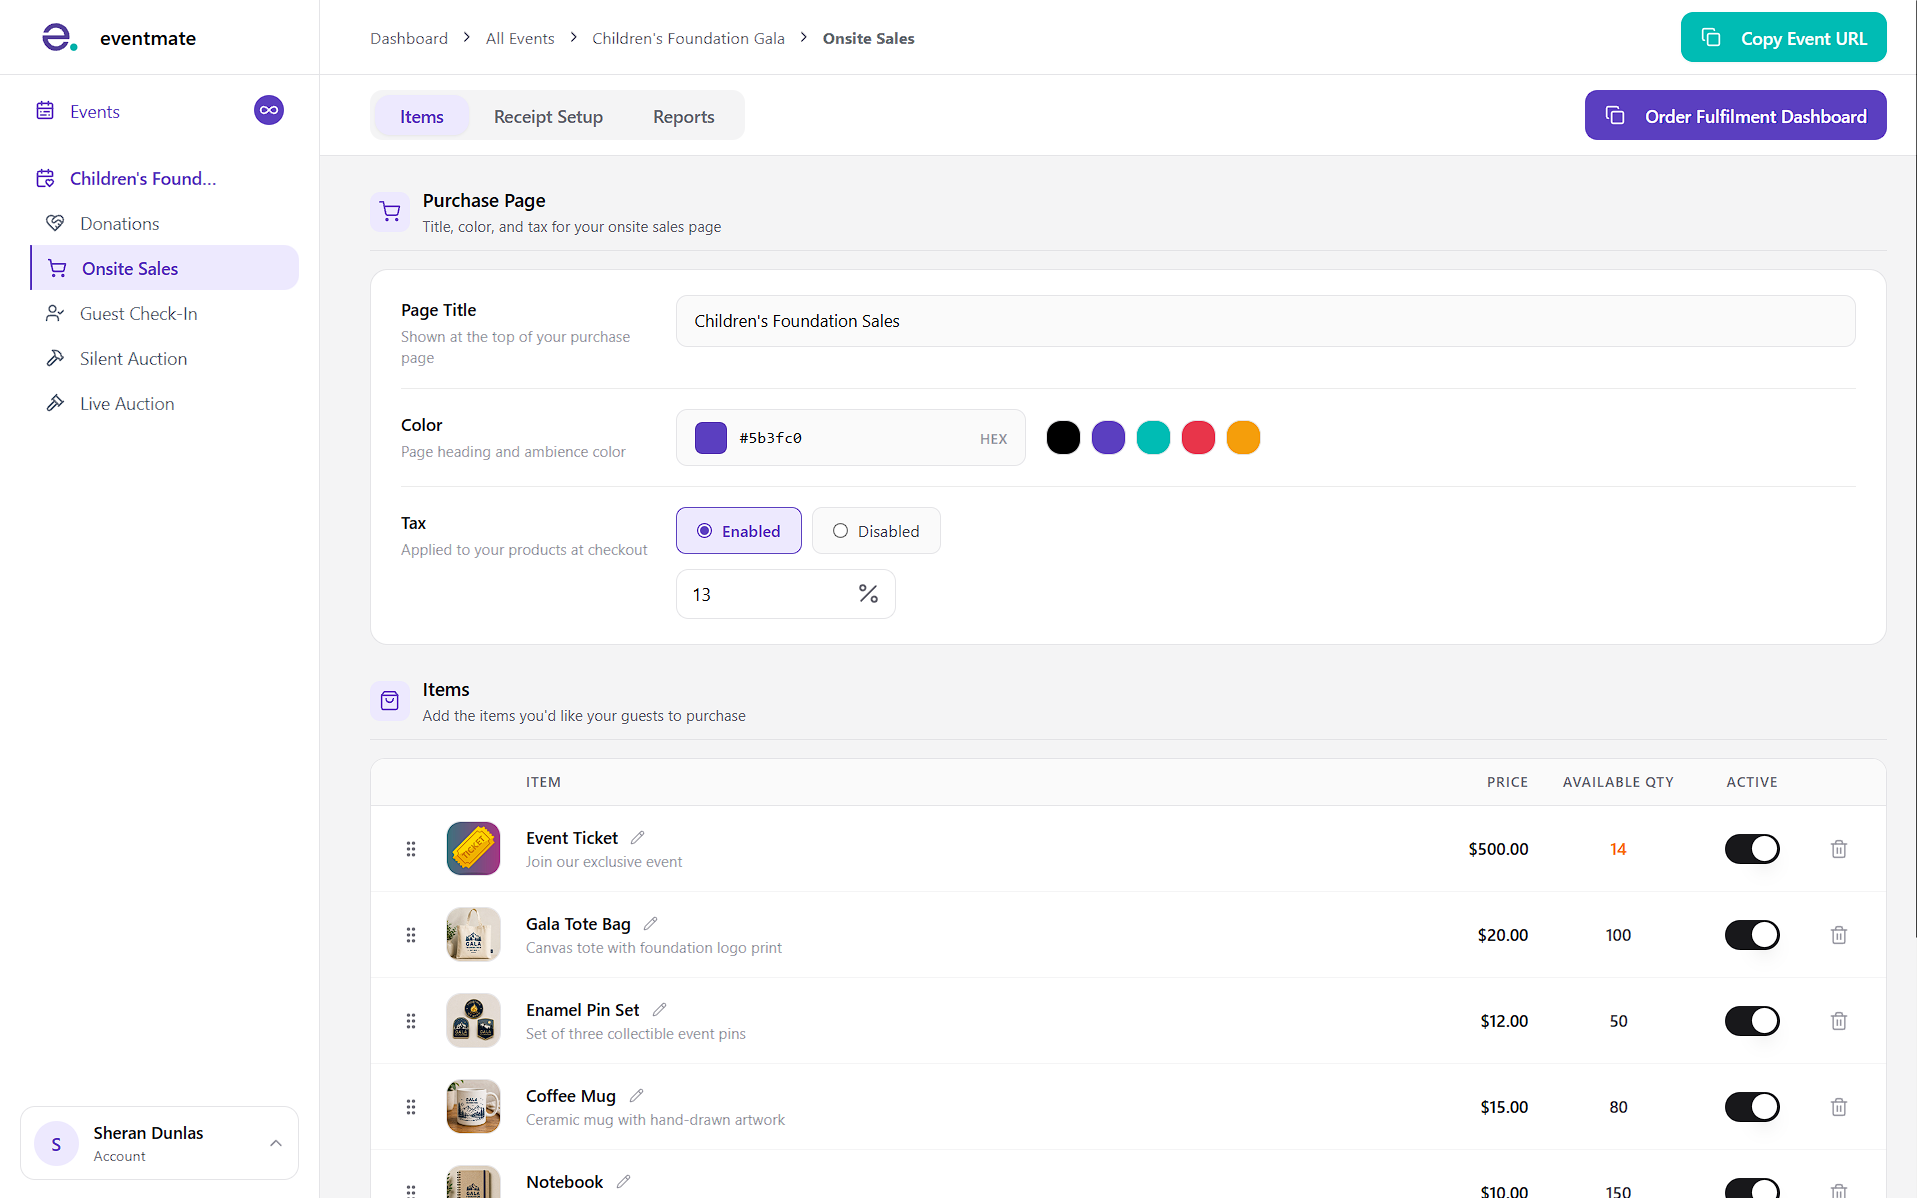
In this section you can add a page title, choose a color for the page branding, and enable or disable tax.
When tax is enabled, enter the percentage that will be charged to guests at checkout.
Adding your items
To add items to your event, scroll to the Items section and click Add Item.
Enter the item name, description, unit price, quantity available (inventory), and an image for the item.
Please note that images must be a minimum of 400×400px and a maximum of 1600×1600px.
Setting up your receipt
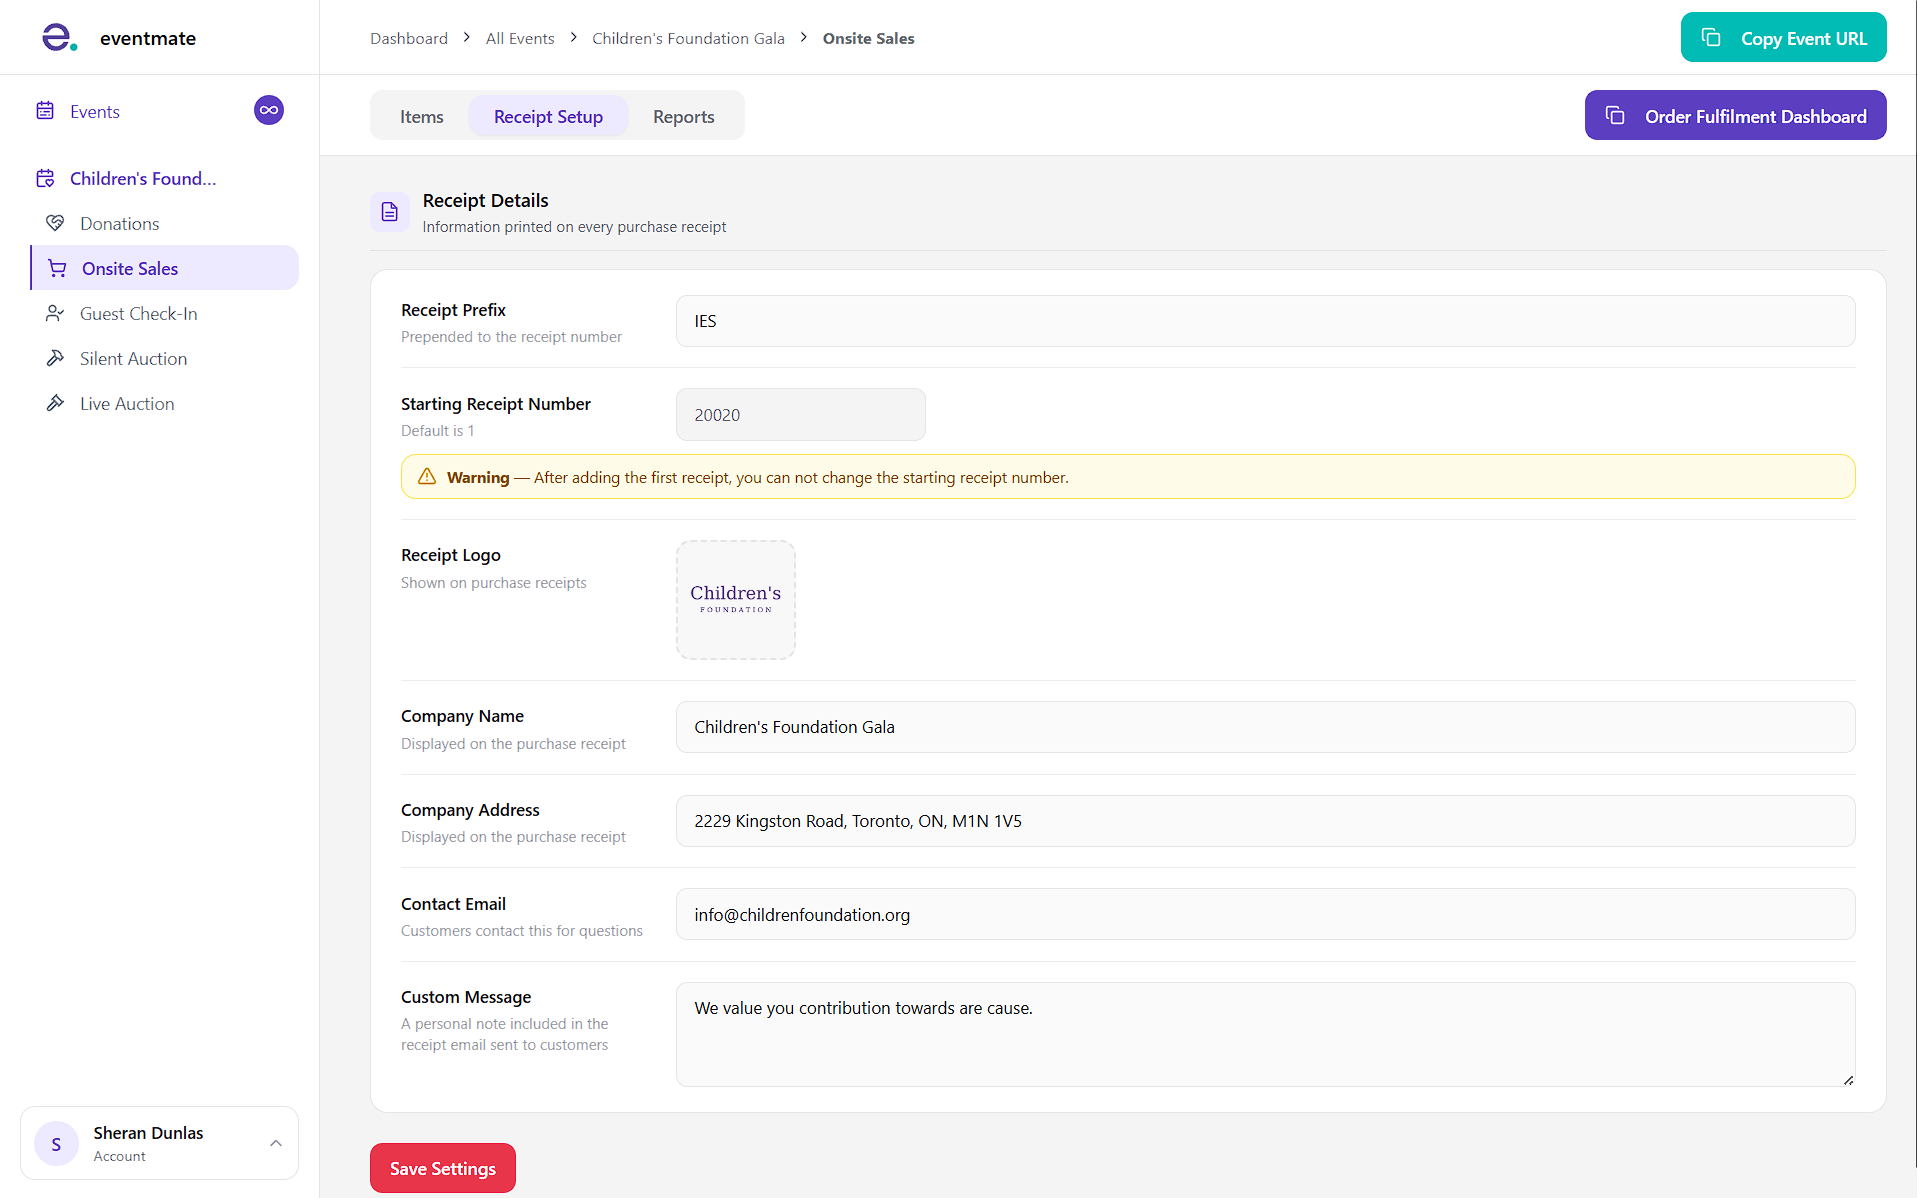
Once your items are added, go to the Receipt Setup tab and complete the following details to keep your receipts compliant:
- Receipt prefix (optional)
- Starting receipt number
- Receipt logo (also applied to the email that's sent)
- Company name
- Company address
- Contact email
- Custom message: Included in the receipt email — add any instructions here if needed.
Enabling your on-site sales button
Once everything is set up, the final step is to enable the on-site sales button. Navigate to the event section, open the Buttons tab, and scroll to the On-Site Sales Button section, located just below the donation button.
Once enabled, you can rename this button and set it as your primary button if needed (provided the donation button is also enabled).